- Download our OpenVPN Bundled Server profiles
- Extra the .ZIP file
- Browse to the extracted folder. Enter into a country folder (eg Russia folder) and extract the profile you would like to use. This should give you another folder with 3 files in it (.key .crt .ovpn)
- Open up terminal and type inUbuntu/Debian:
sudo apt-get install network-manager-openvpn-gnome
Fedora/Redhat/Centos
yum install network-manager-openvpn-gnome
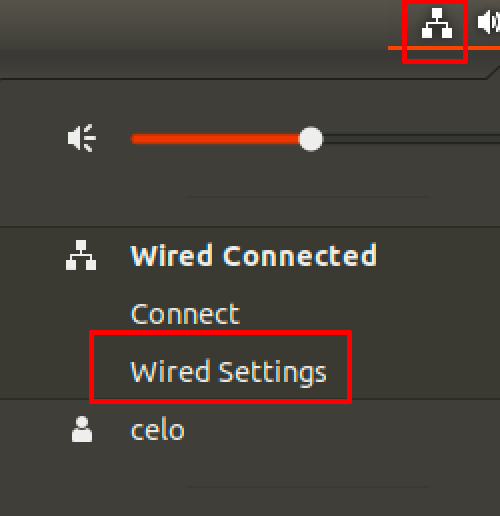
- Click on your network connection > Wired connected > Wired Settings

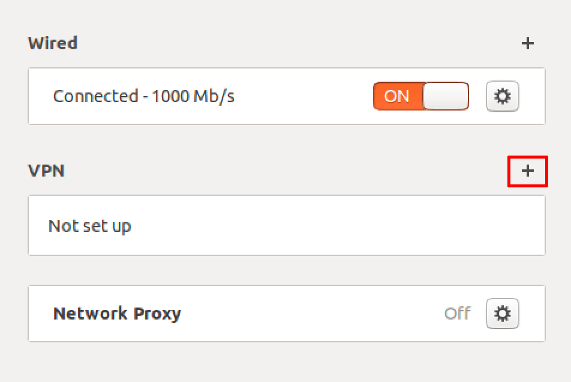
- Click + and select OpenVPN

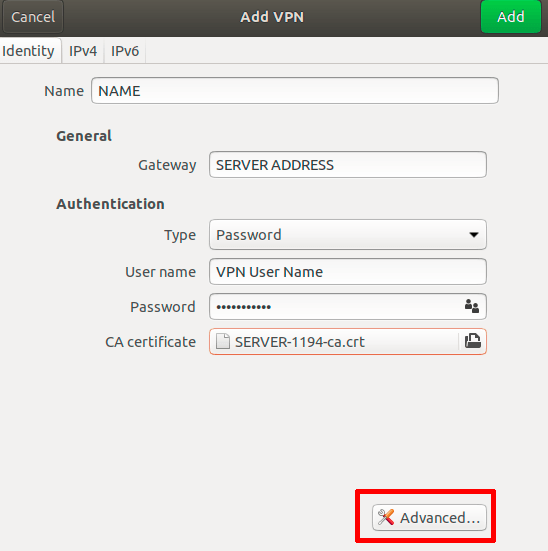
- Enter in a connection name (can be anything)
- Enter in the server address you are setting up
- Type = Password
- Enter in your VPN username (not your email) and password
- Click on CA Certifcate and browse to the Country folder/profile you extracted above and select the .CRT file

- Click on Advanced
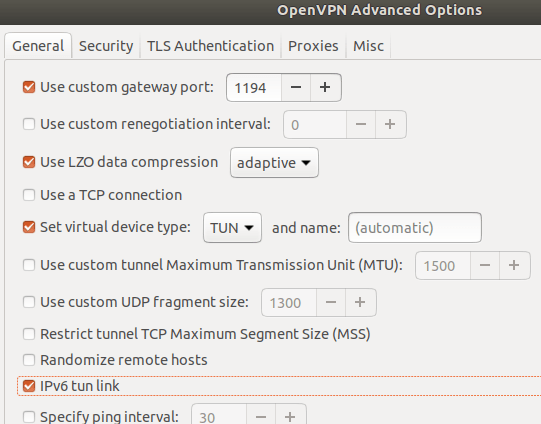
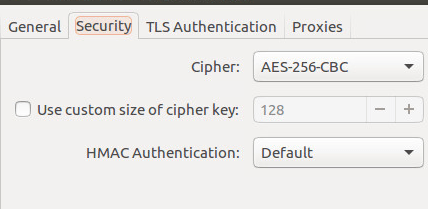
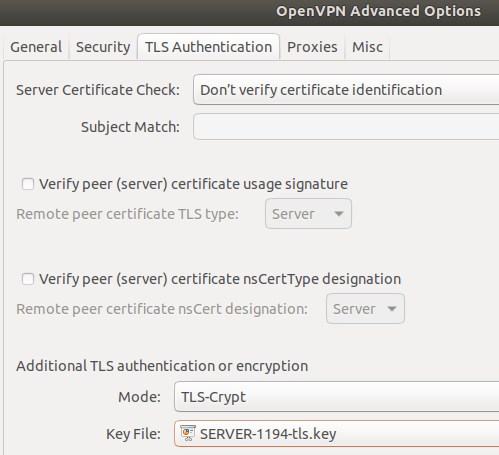
- Select the same options as below

- Go to Security tab and set Cipher to AES-256-CBC

- Click on TLS Authentication tab
Mode = TLS-Crypt
File = Browse to where you extracted to profile above and select the .KEY file

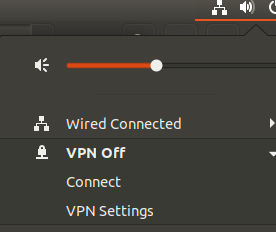
To connection to the VPN, simply click on your network connection > VPN > Connect
- On Ubuntu 17 and above run the following commands, then re-connect to VPN
sudo nmcli connection modify <vpn-connection-name-you-set> ipv4.dns-priority -42

systemctl restart network-manager.server
- On Ubuntu 16.04 do the below
– Edit the fille NetworkManager.conf file under
/etc/NetworkManager and comment out dns=dnsmasq line#dns=dnsmasq
- Restart NetworkManager
service restart network-manager