- Download our OpenVPN Server Profiles and extract the .ZIP
- Open up one of the server profile files in a text editor and leave it opened (notepad, gedit etc)
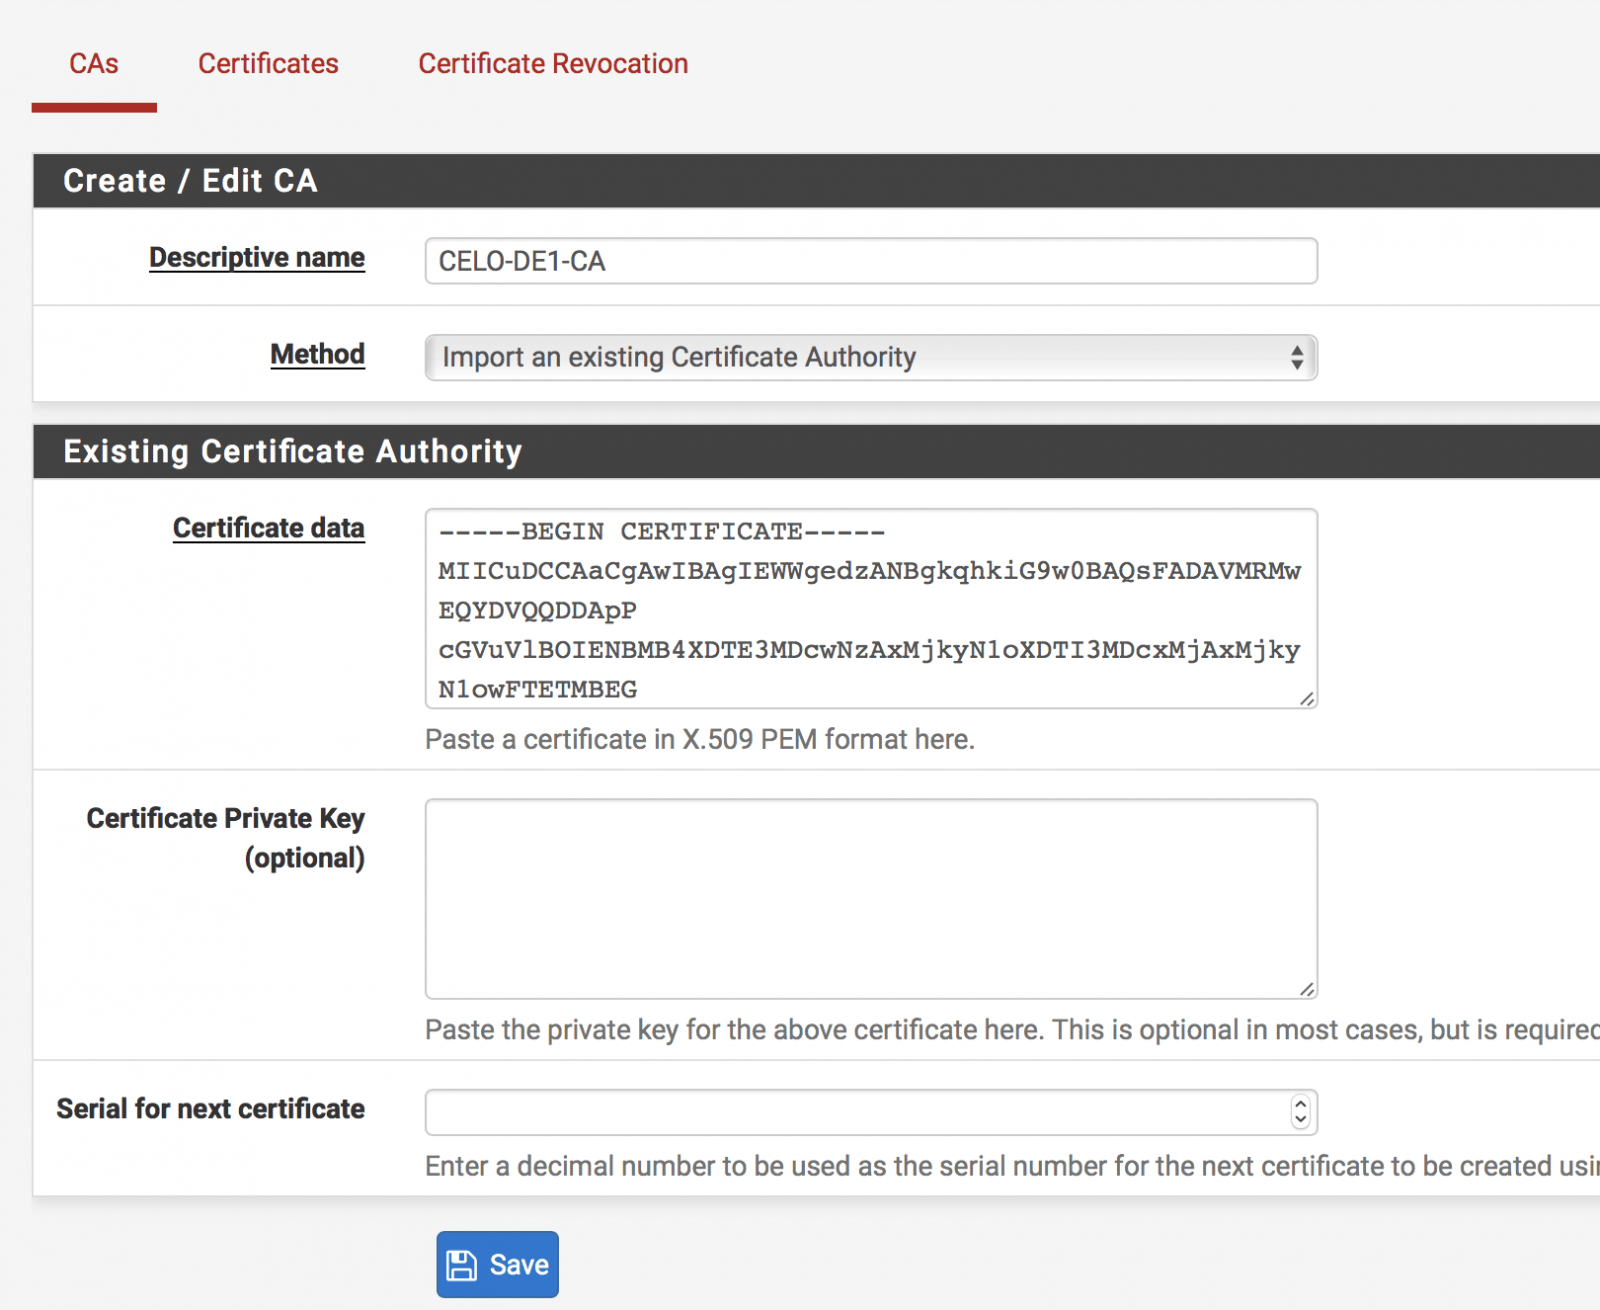
- Login to your pfSense Web-UI and navigate to main menu, then System > Certificate Manager > CAs Tab > Click on the +
- Give it a Descriptive name. A name that you can identify from the rest of other Certificate Authority inside your pfSense box. For example CELO-Germany etc.
- Under Method select Import from Existing Cert Auth.Under Certificate date text field, Go to your .OVPN file and copy everything that sits between <ca> and </ca> tag and paste it to the text field (like below) then click on Save

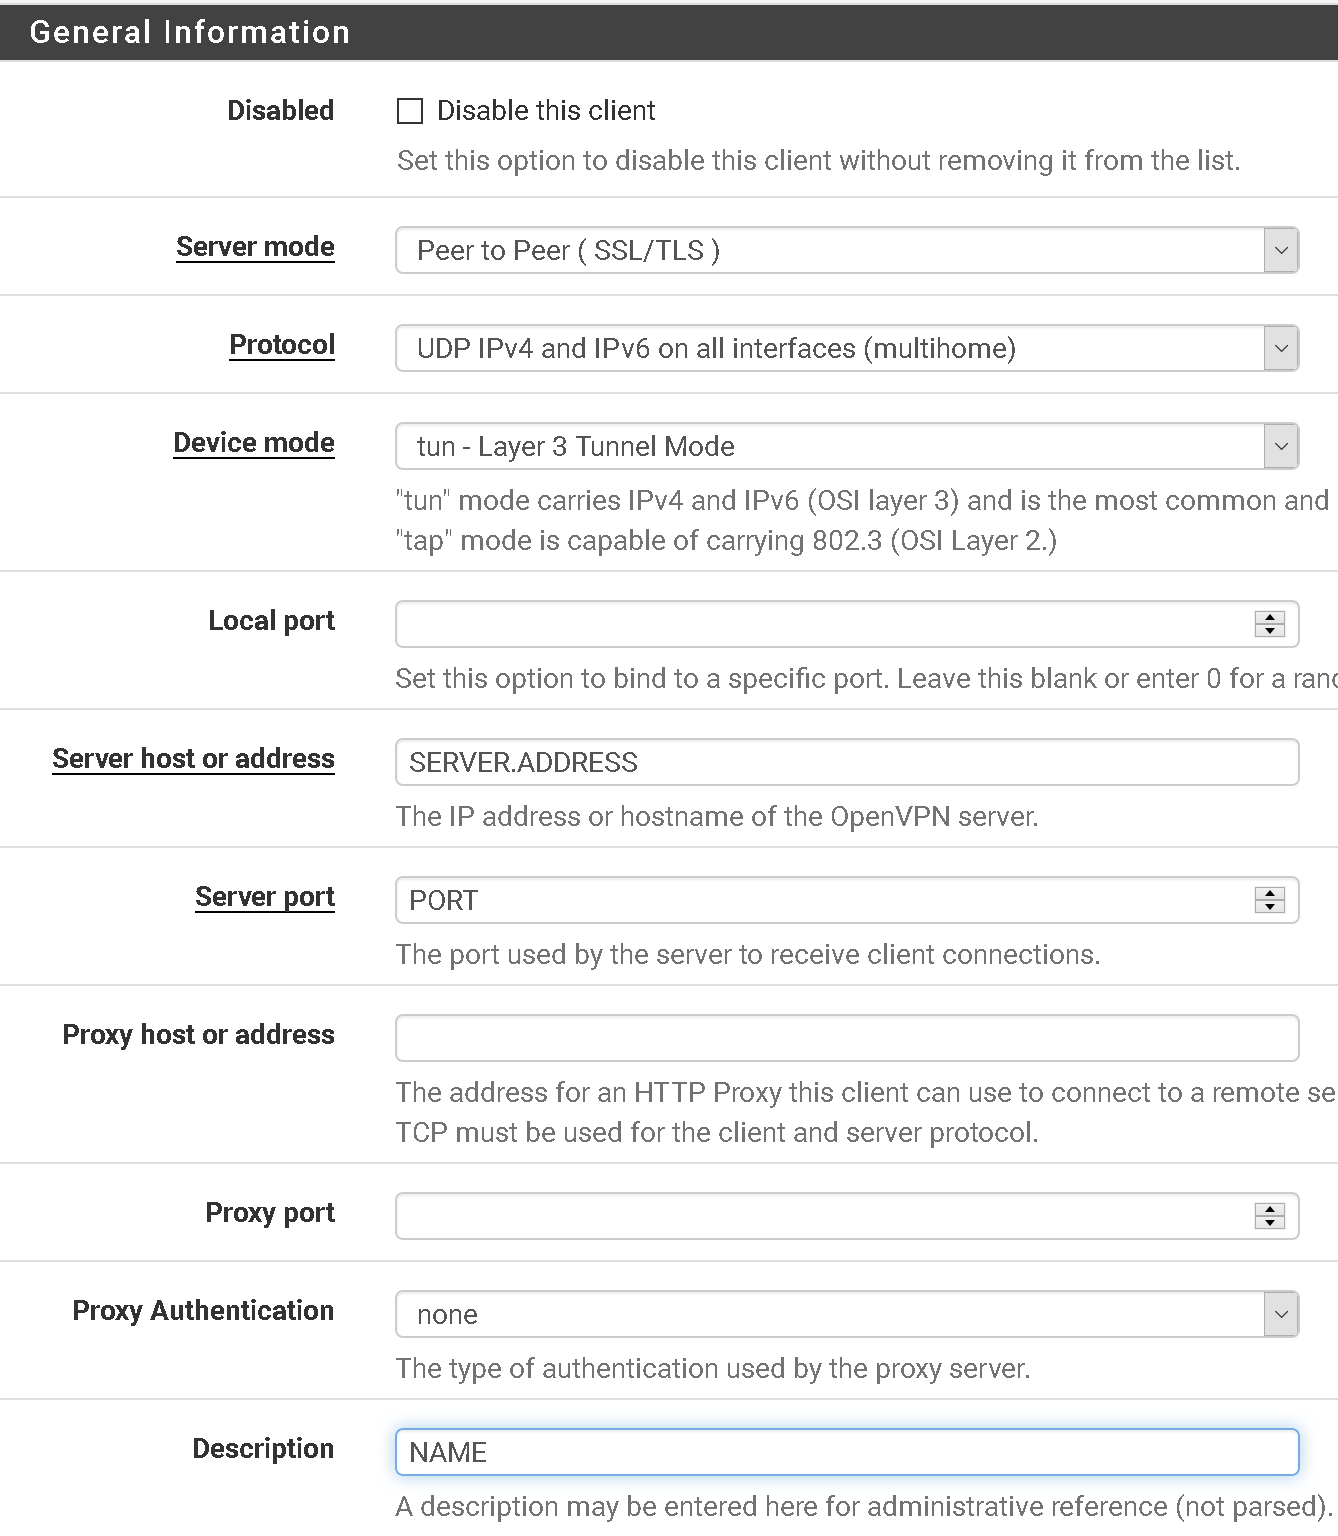
- Click on VPN menu > OpenVPN > Clients > +Add
- Copy the below settings. Enter in the server name/address you would like to set up, the port number and a description for the connection

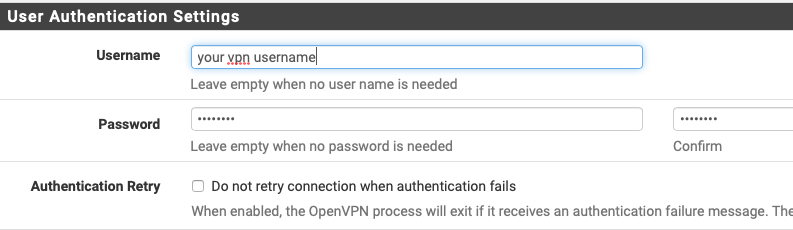
- Enter in your VPN username (not your email) and password

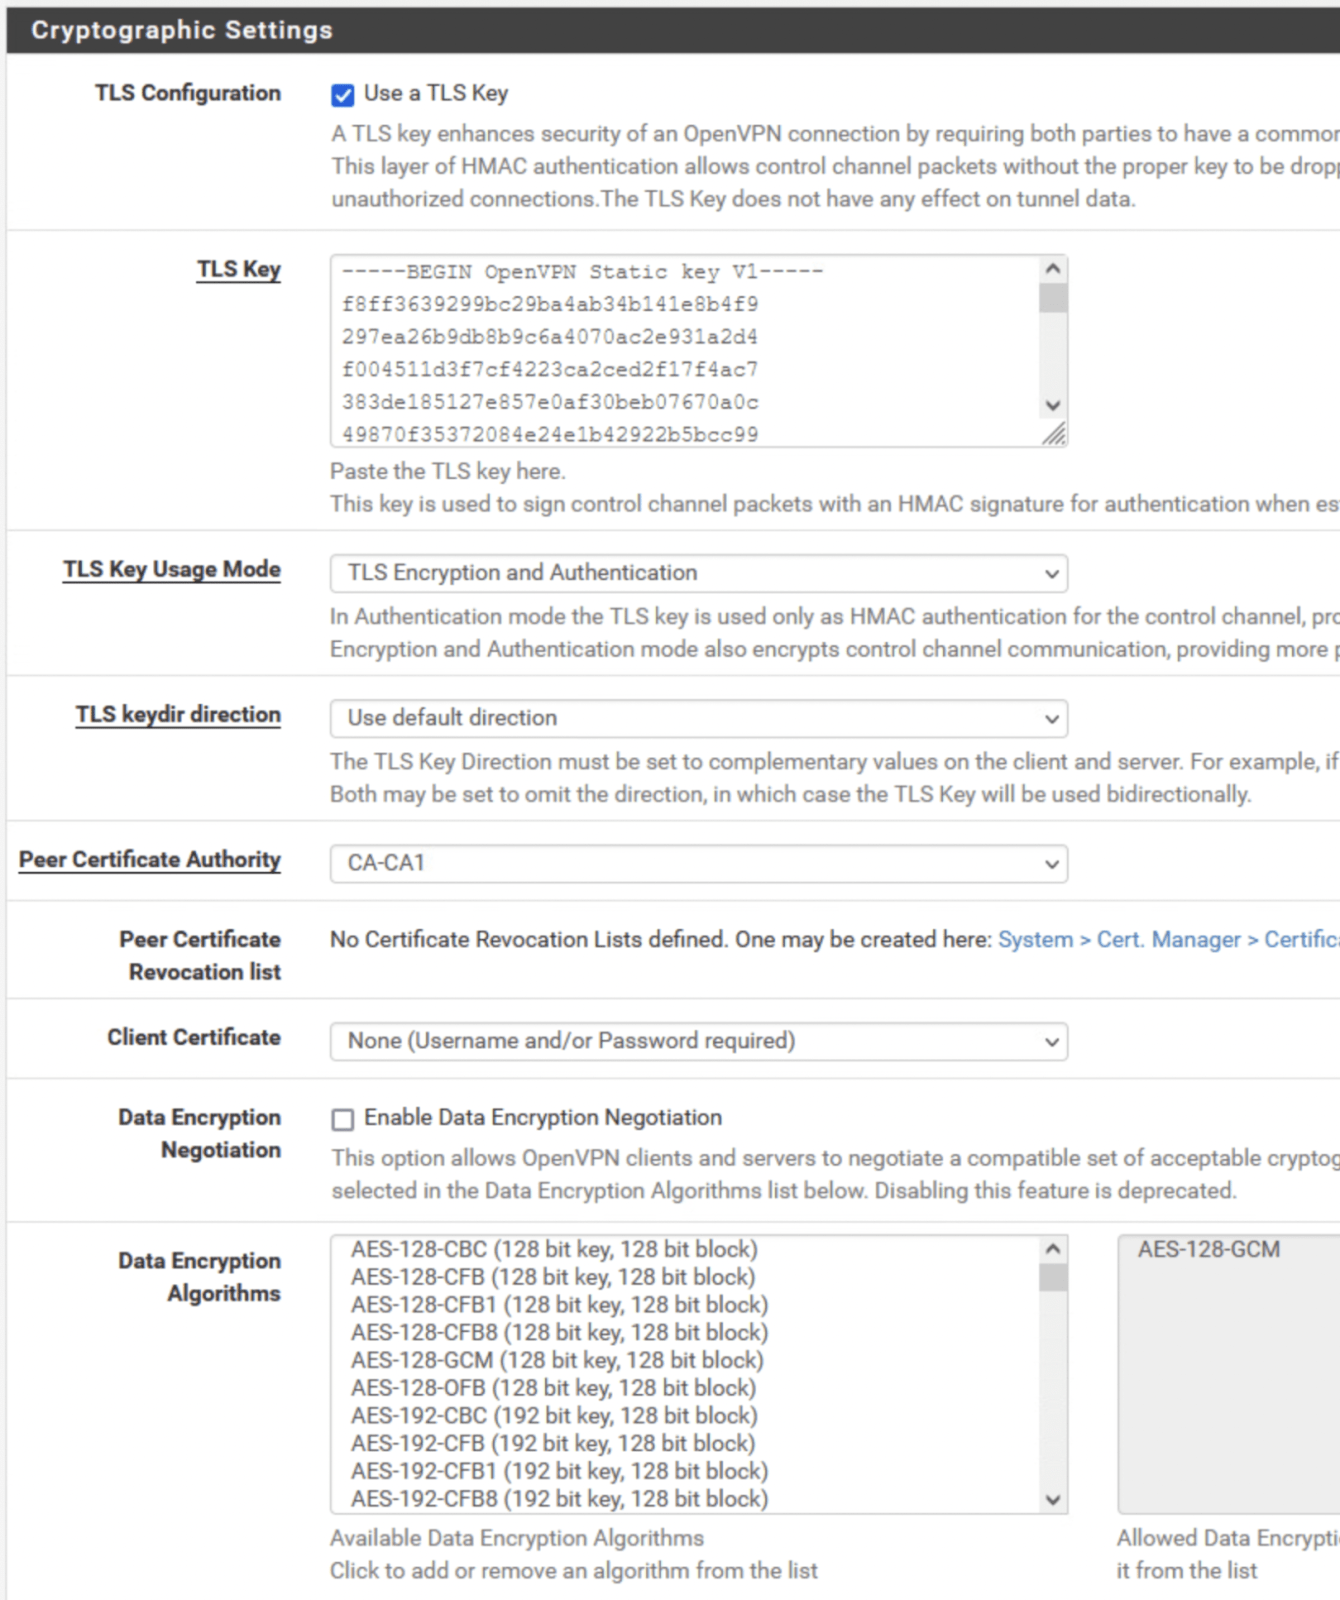
- Under TLS authentication, Untick “Automatically generate a TLS Authentication Key”
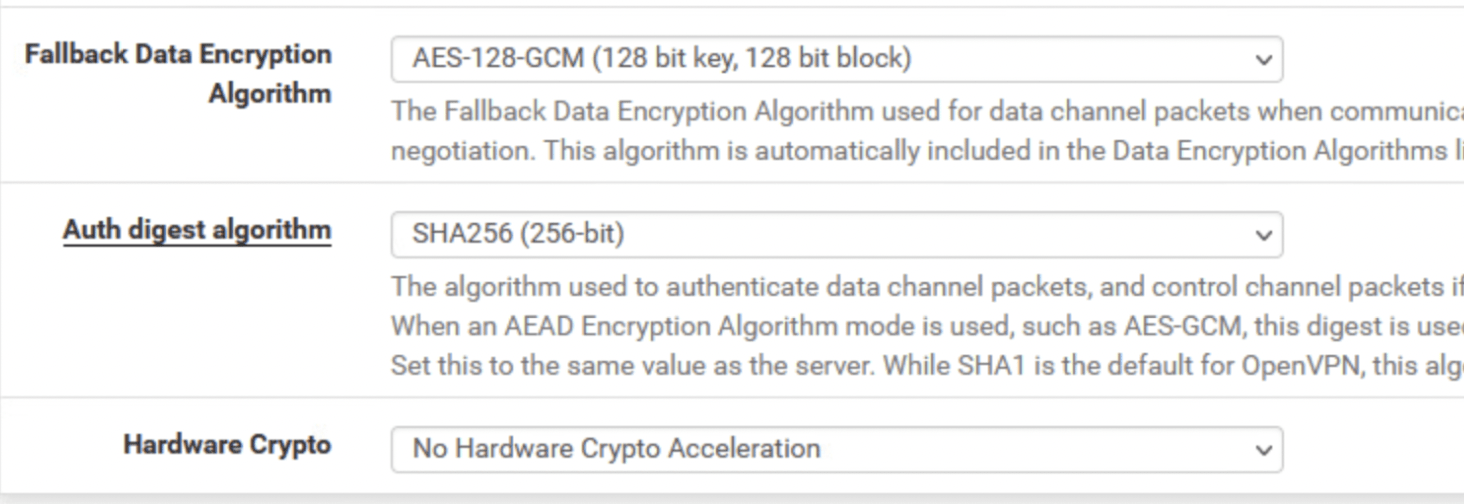
Go back to your .OVPN file and copy the text between <tls-crypt> and </tls-crpyt>Peer Certificate Authority = Select the CA you created in step 5Client Certificate = None (username and/or password required)
Copy rest of the settings from below

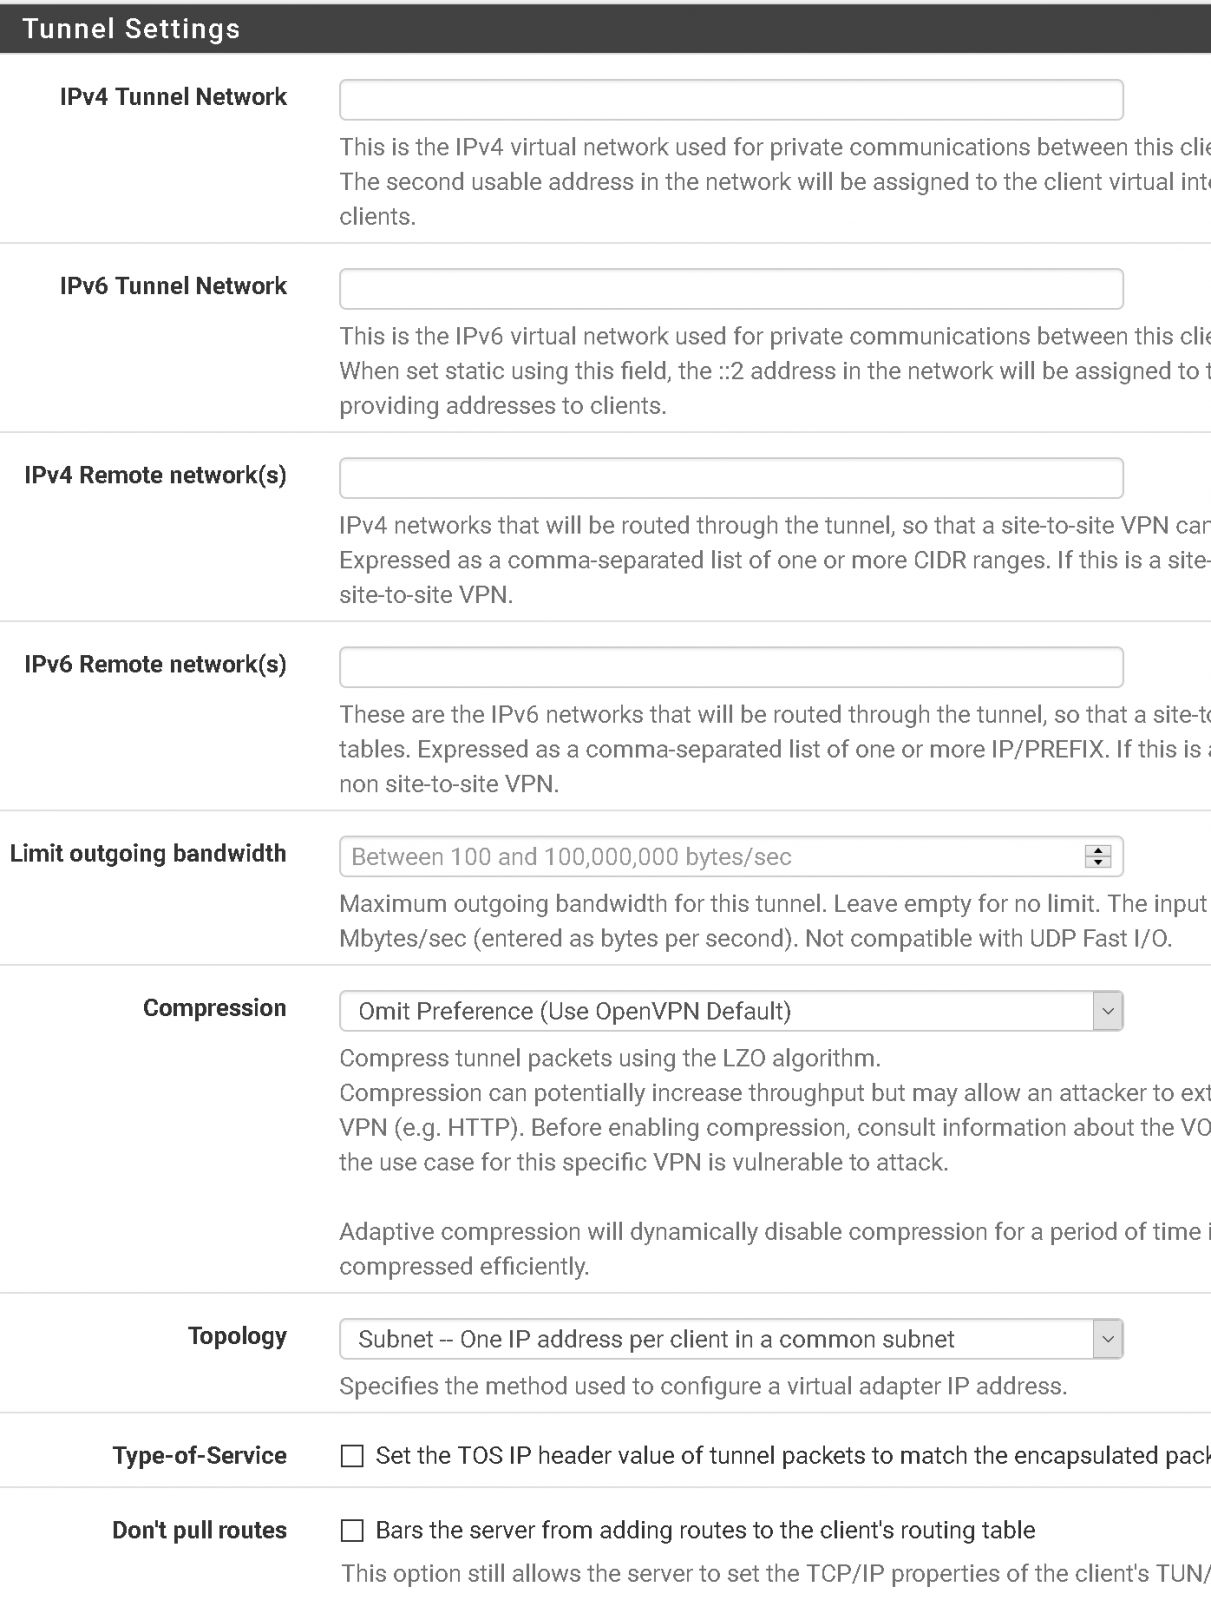
- Leave all fields blank/default. Change Compression setting to Omit Preference

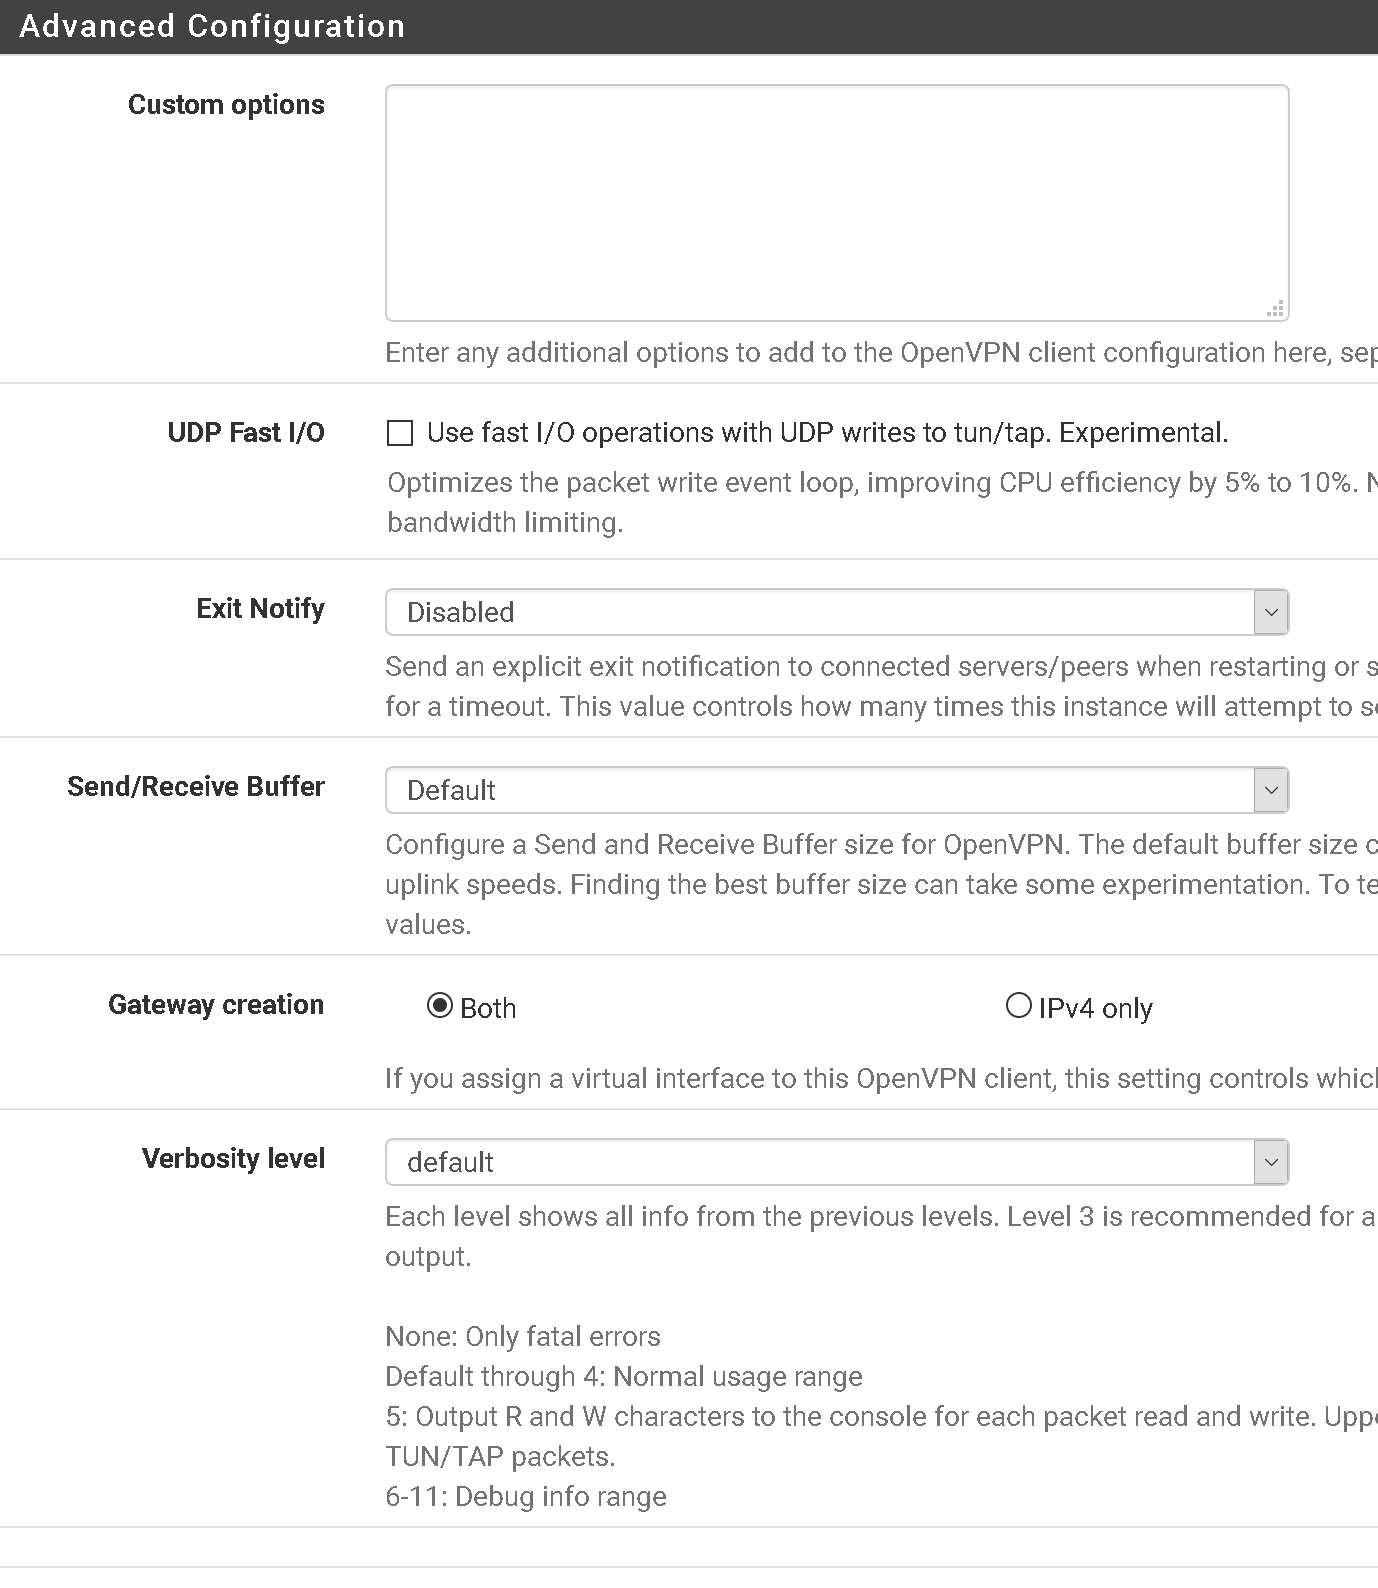
- Advanced settings should look like below

- Go to Status > OpenVPN. You should see that the openvpn service is up and running with a virtual address assigned etc.
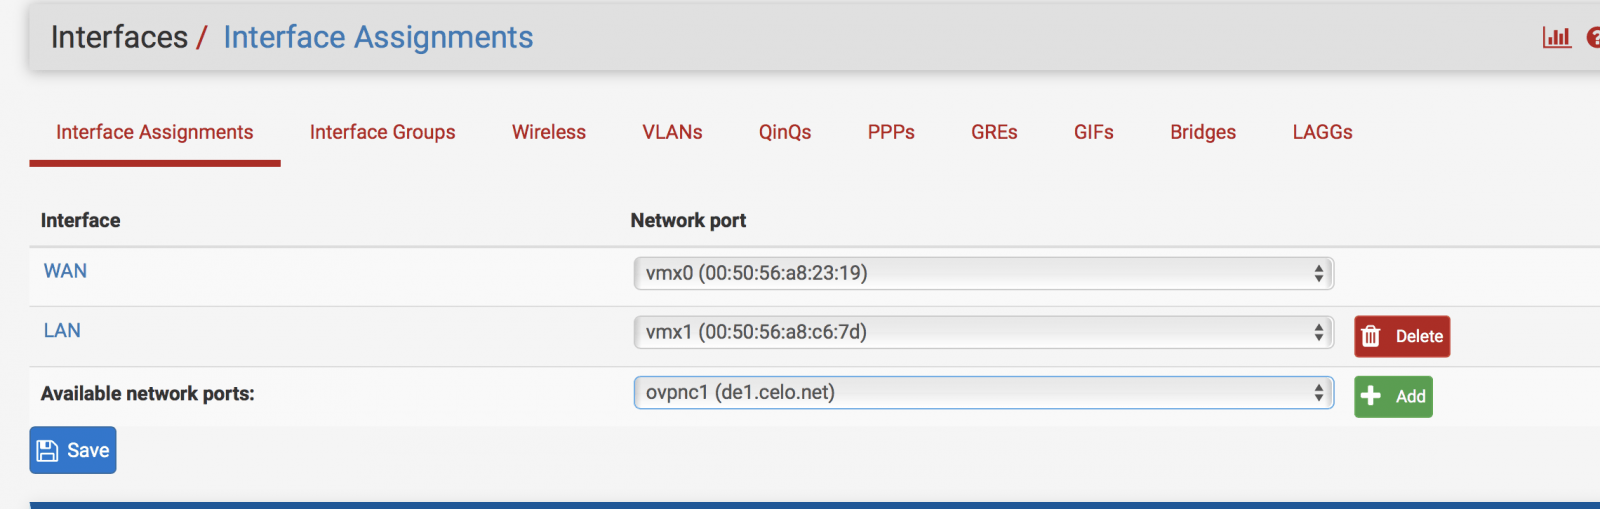
- Go to Interfaces > Assign. You should see a new available network interface. Click Add

- Click on the new Interface name (OPT1) > Copy the below settings.
- Click Save > Apply Settings

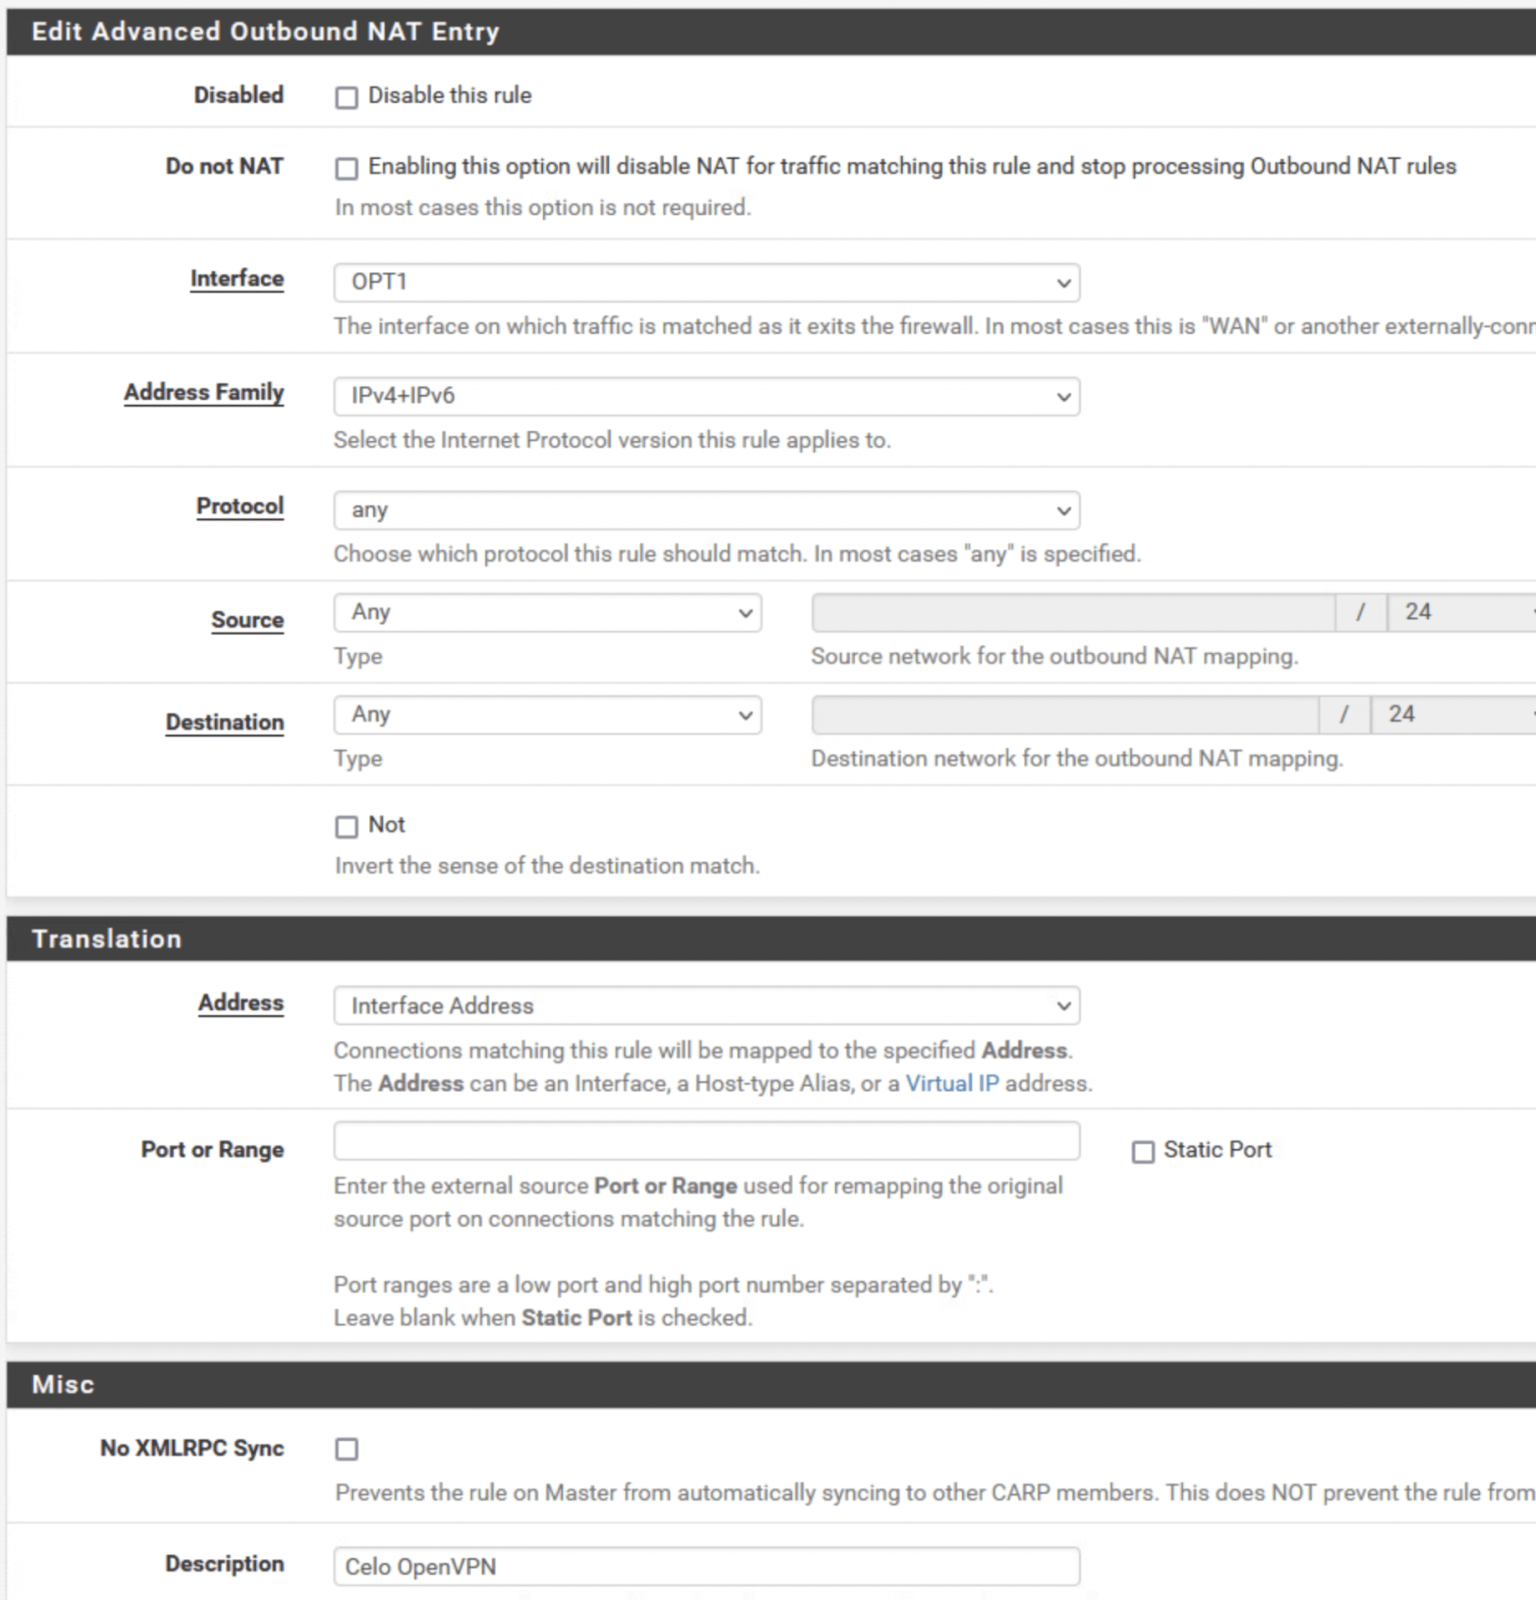
- Click on Firewall > NAT > Outbound > Select Manual Outbound NAT > Save > Apply Settings
- On the Firewall / NAT / Outbound page > Click on Add
- Copy the below settings > Save > Apply Settings

- Reboot PFSense via Diagnostics > Reboot. Once rebooted, log back into PFSense and check the status of OpenVPN. If connected, check the connection on a device that is connected to the same network as PFSense.
PFSense

Updated on August 4, 2022
Need Support?Contact Support