1. Home
  2. Guides
  3. Kill Switch
  4. Windows Firewall Kill Switch

Windows Firewall Kill Switch

Kill switch for Windows 7 and Windows 10

Check and change the windows network profile of your local area network
Windows 7
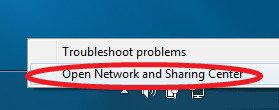
  • Click on the network icon in your task bar > Open Network and Sharing Center
    Windows-7-Network-And-Sharing-Center
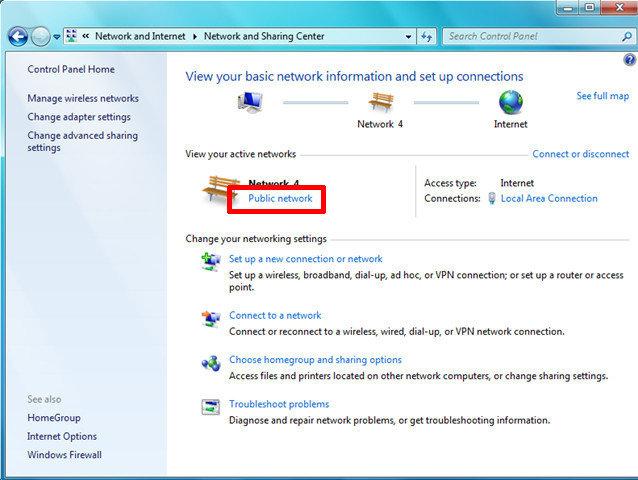
  • Your default connections will appear. If it is set to “public” change this to private
  • Click on “Public Network” underneath the network
    Windows-7-Network-And-SharingCenter-Network
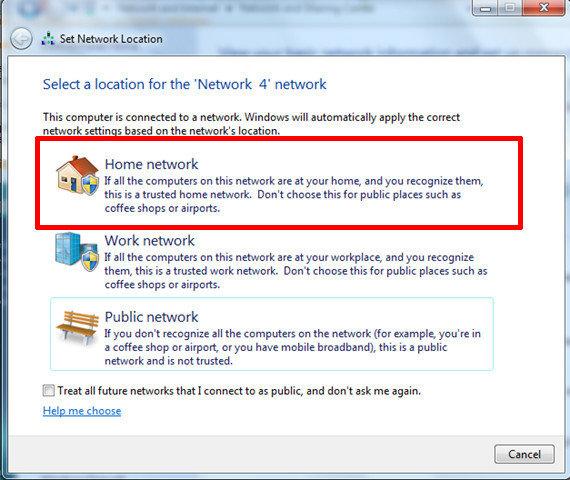
  • Click on Home Network to make it private
    Windows-7-Set-Network-Profile
Windows 10
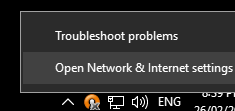
  • Right click on the network icon > Open Network and Internet Settings
    windows-10-network-and-internet-settings-option
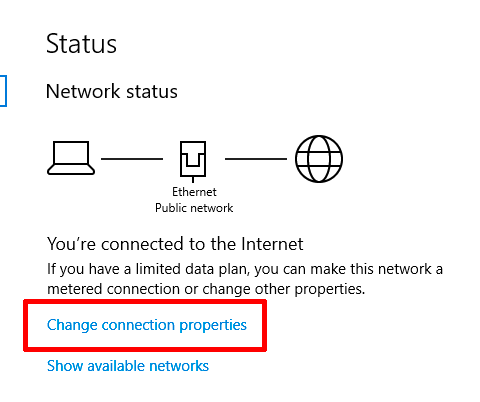
  • Click on Change connection properties
    Windows-10-Network-Status
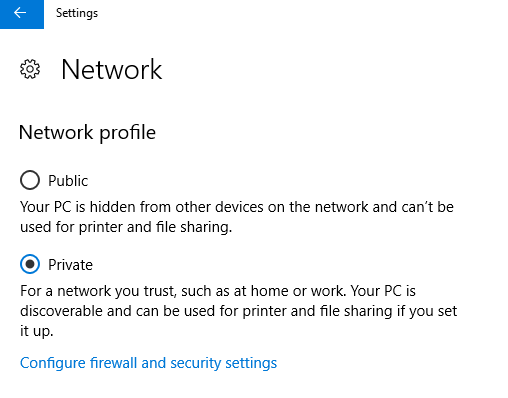
  • Click on Private
    Windows-10-Network-Profile
  1. Open up Advanced Firewall settings. You can search for this in the start menu
  2. Backup your current firewall settings. Click on Action > Export Policies. Pick a location and save the file
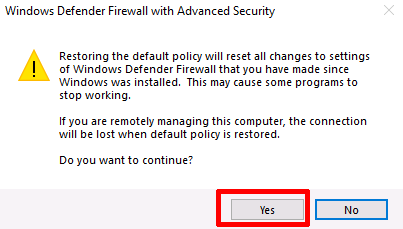
  3. Action > Restore Default Policy > Yes
    Windows-Firewall-Restore-Default
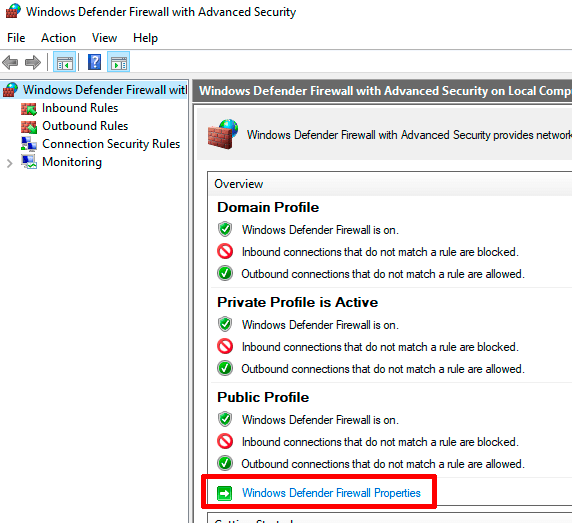
  4. Click on Windows Defender/Firewall Properties
    Windows-Firewall-Advanced-Settings
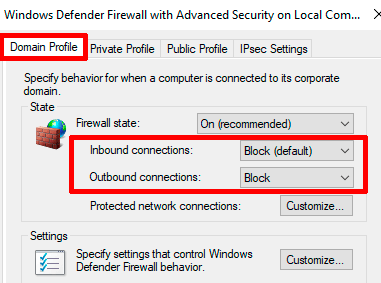
  5. Under Domain Profile, set Inbound and Outbound to Block (like below)
    Windows-Firewall-Domain-Profile
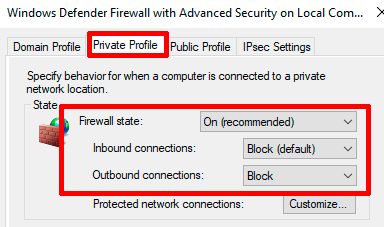
  6. Click on the Private tab, and set Inbound and Outbound to Block (like below)
    Windows-Firewall-Private-Profile-Settings
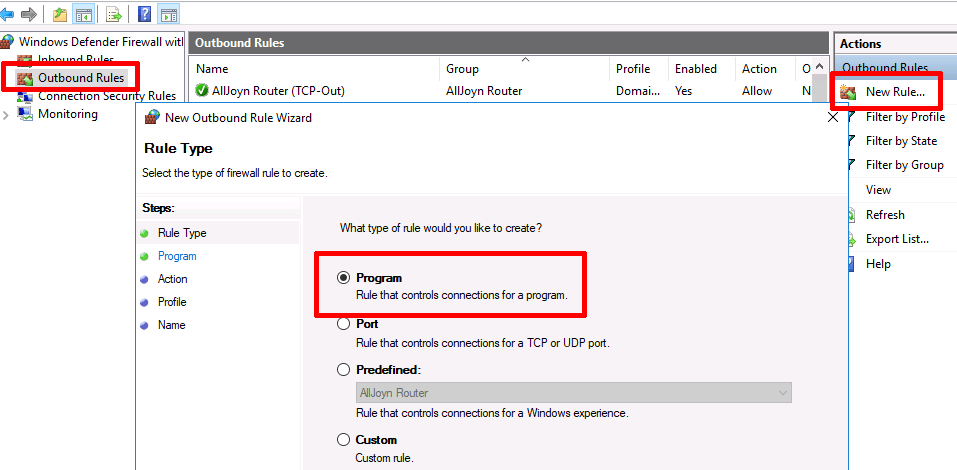
  7. Click on Outbound rules > New Rule > Program > Next
    Windows-Firewall-New-Rule
  8. Click on browse then browse over to the following path C:\Program Files\CeloVPN\ and select celovpn.exe
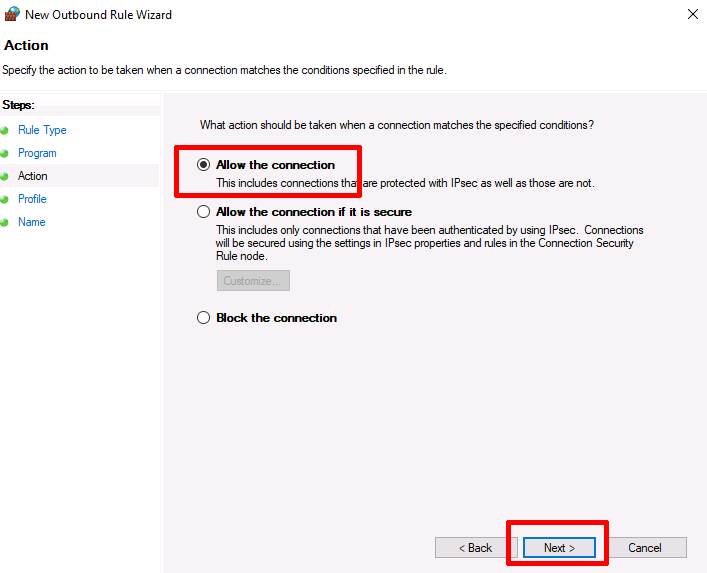
  9. Click Allow the connection > Next
    Windows-firewall-rule-openvpn-allow
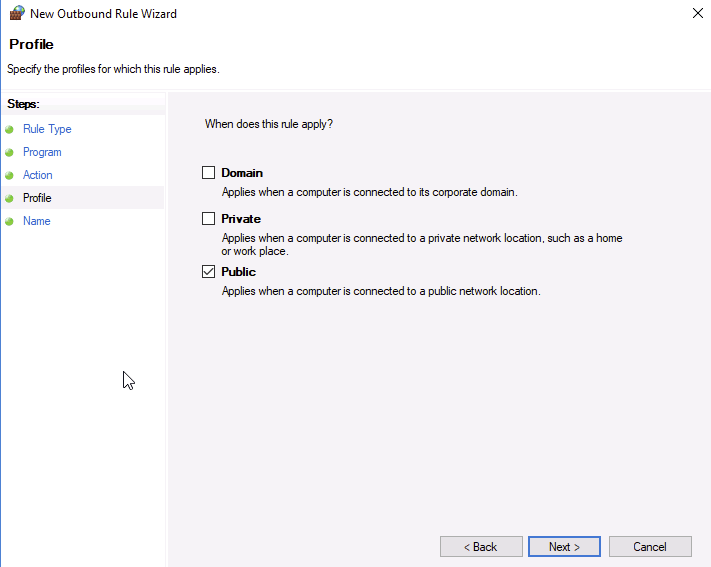
  10. Uncheck Domain and Private > Next
    windows-firewall-openvpn-rule-profile
  11. Give the rule a name then Finish
    windows-firewall-rule-openvpn-name
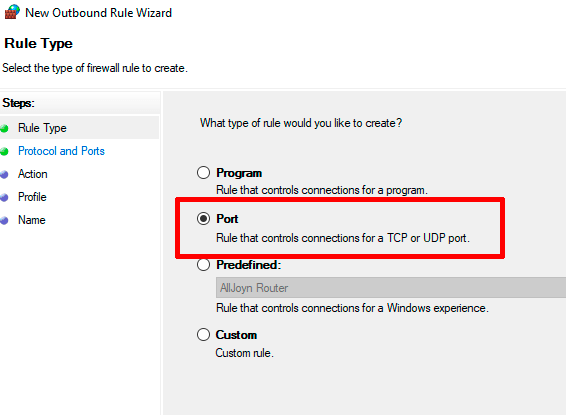
  12. Click on Outbound rules > New Rule > Port
    windows-firewall-rule-port
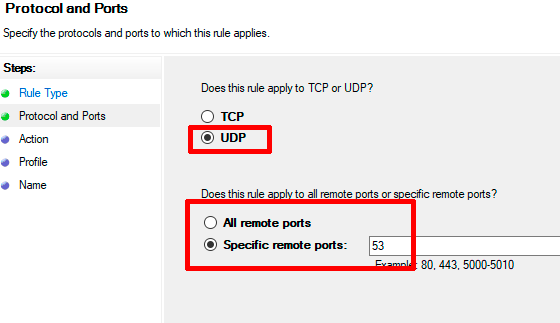
  13. Select UDP and enter in 53
    windows-firewall-dns-53-rule
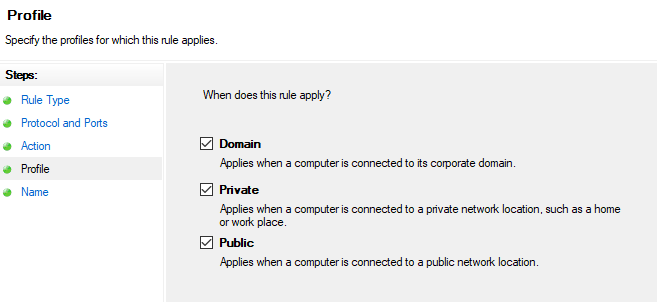
  14. Select All profiles > Next
    windows-firewall-rile-53-rule-allow-all
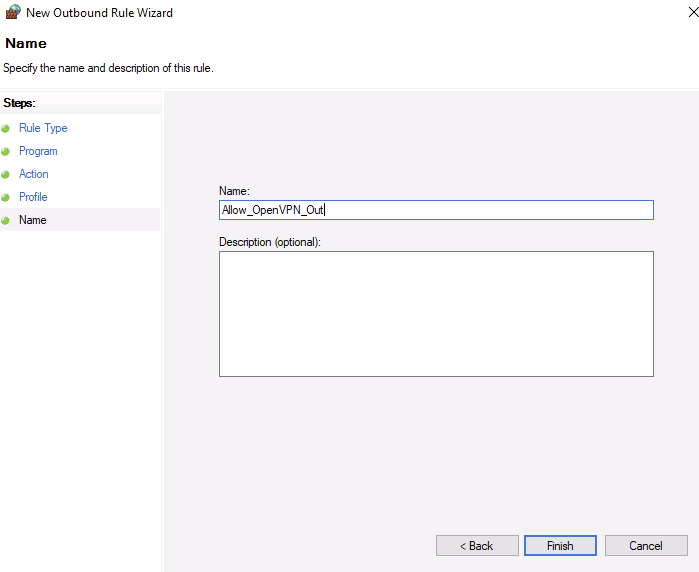
  15. Give the rule a name > Finish
Repeat Steps 12 - 14

UDP port 1194 and TCP port 443 are required for the connection to be successful

Important Note

If you ever get a firewall popup to add a program, make sure to uncheck “Private networks” and only have “Public networks” checked before clicking Allow access; If you fail to monitor this, the killswitch will be pointless

Updated on January 22, 2020
Was this article helpful?

Related Articles

Need Support?
Can't find the answer you're looking for?
Contact Support