- Visit DNSLEAKTEST
- Click on Extended Test button
- Wait for the Test to complete. If you see an IP/Country show up that is in the same country as your physical location, your computer is leaking.
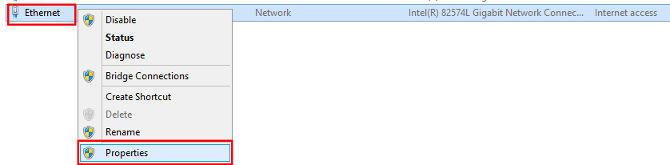
- Open up Network and Sharing Center > Change Adapter Settings
- Open up the properties of your main network adapter that is connected to your home network/internet. The default name is usally “Ethernet” or “Local Area Connection”

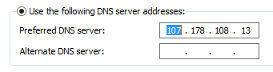
- Select Internet Protocol Version 4 (TCP/IP) > Properties

- Select “Use the following DNS server addresses”

- Enter in one of our DNS servers listed HERE and save those settings
- Go back to DNSLEAKTEST site and run the extended test again

Windows 10
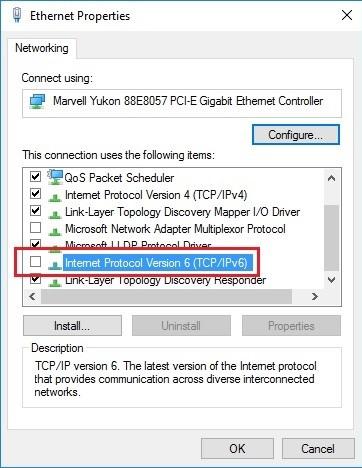
If you still see leaks, please disable/uncheck IPv6 on your main network adapter